Once decided to study in the US, students must not only be accepted but also obtain permission to live and study in the US. An I20 is issued to students only after the decisions are made by the universities.
An I20 is an official document (Certificate of Eligibility for Non -Immigrant student status (F1) provided by the universities to all International students to study in the US.
An F1 visa is a non-immigrant visa for those wishing to study in the US. An I20 is necessary to apply for an F1 visa.
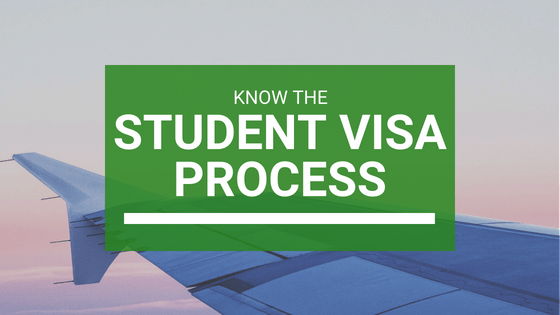
Please find below the steps involved in the visa application process:
1. Visa Application Fee Pay SEVIS Fees
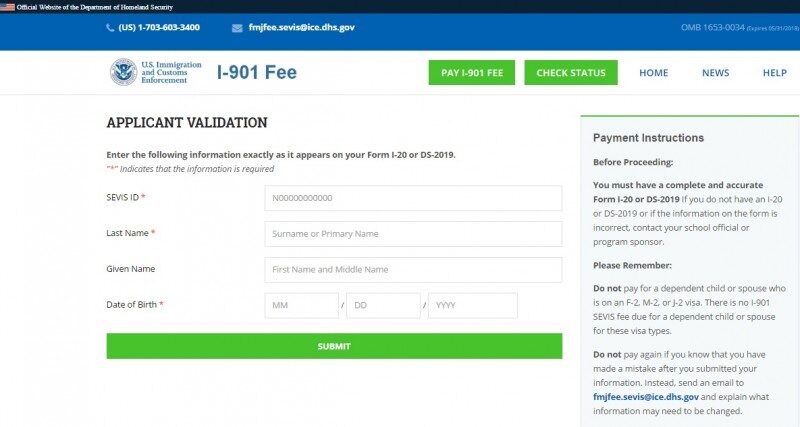
You will need to pay a separate Student and Exchange Visitor Information System (SEVIS) fee in addition to the visa application fee Pay SEVIS fees here www.fmjfee.com. Please bring your I-901 SEVIS fee receipt to your interview at the Consulate.
2. DS-160 form online
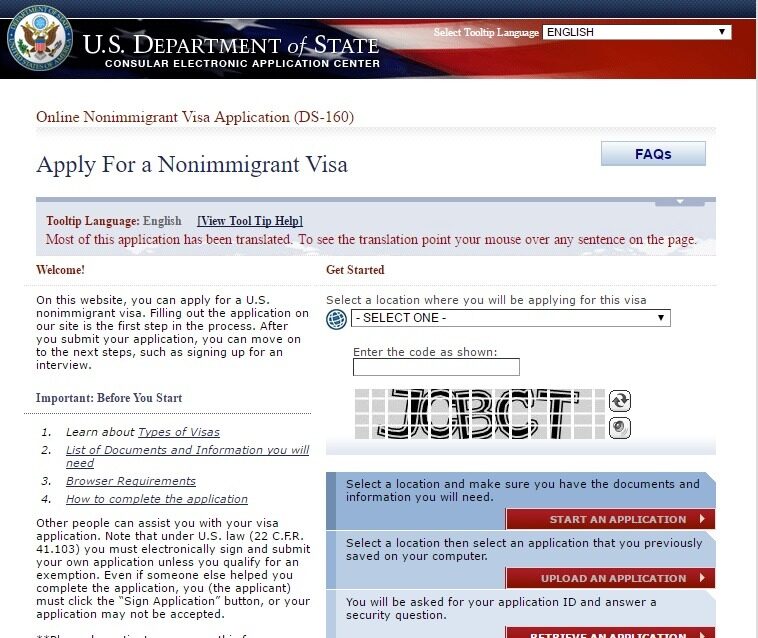
Each applicant must complete and submit the DS-160 form online https://ceac.state.gov/GenNIV/Default.aspx prior to your interview at the Consulate. All information must be correct and accurate. Once the form is submitted, you cannot make any changes.
Points to remember while filling up the DS- 160 form:
- If you stop working on this application for more than 20 minutes, your session will expire. You will have to start over unless you have recorded your Application ID number or have saved your application to a file on your computer. Write down the Application ID displayed on the top right-hand corner of the page. If you need to close the browser before submitting your application, you will need this Application ID to continue your application.
- The completed DS-160 application form will generate an alpha-numeric barcode confirmation page. Print this page. The printed confirmation page is required for the appointment at the Visa Application Center and for the interview at the Consulate.
- Once you have printed the barcode confirmation page, hit the “Back” button on your web browser and then email yourself a backup copy of the DS-160. The emailed file will be in PDF format, which requires Adobe Acrobat to view or print.
3. Visa Fees
Once you have completed the DS-160, you must pay the
visa fee of $160.
In order to ensure the proper amount is paid and activated in a timely manner, first create a profile here and choose the Schedule Appointment option. On the payment confirmation screen, you will be presented with payment options and further details of how to initiate payment. You will be able to book the visa appointment once the receipt is activated
You can pay your nonimmigrant visa application fee in cash at any of the designated AXIS or Citibank branches. Before going to the bank, you must print and carry the applicable U.S. visa fee collection slip available after logging into your profile.
4. Appointment at the Consulate
Now you will need to login to your profile with the same credentials you used to pay your visa fee. Once you are in the system, you will see your dashboard. Click on Schedule Appointment on the left-hand side menu. This will start the process for scheduling your appointment.
You must schedule two appointments, one for the Visa Application Center (VAC) and one for the visa interview at the Consulate.
- First, schedule your visa interview appointment at the Consulate.
- Second, schedule your appointment at a Visa Application Centre. This appointment will allow you to go Visa Application Centre location to have your fingerprints and photo taken. This appointment must be at least 1 day before your visa interview appointment at the Consulate.
Follow these simple steps to get a student visa and make your dream of studying abroad come true. You can visit nearby Inspirus Branch for in-depth guidance and solutions for your queries.